The One Bit Romhack
I was on a retro gaming forum a few weeks back, and stumbled upon a fairly simple question from a user regarding the NES Kirby's Adventure game.

To clarify their question, in most Kirby games, pressing the A button will cause Kirby to jump into the air, then fall back down to the ground just like any old platformer. While in the air, Kirby can enter an inflated state where he will fall much more slowly, and gain altitude with any additional A presses. In nearly all Kirby games, inflating is done by pressing the A button a second time while in mid-air. However, in the earliest titles, such as 1993's Kirby's Adventure, this is done by pressing Up instead. You still jump and gain greater altitude with A, it's that transition from jumping to inflated that requires an Up input. The user here rightfully notes that players who are accustomed to the newer system will often need to adjust to the older layout.
I saw this post and it got me brainstorming how hard this would be to implement myself. I have hacked Kirby's Adventure before, and while I'm not an NES expert, I have enough expertise with assembly that I had a rough assumption for how this would work. After about 15 minutes of plunking around, I had a fully fledged romhack which clocked in at requiring exactly one bit to be changed. To illustrate my process in doing so, let's walk through my thoughts for how I investigated this, and eventually what the change entailed.
Reverse Engineering
To begin, the goal here is to change the controls of Kirby's Adventure to allow for flight with the A button, rather than just Up. While I would need to do some research to verify my assumption, I visualized this in three steps.
- Find the location in RAM where the state of the pressed buttons is stored.
- Find the line in the code where that RAM address is read and checked if the Up button is being pressed.
- Make a modification to replace — or potentially include — the A button, making sure we aren't modifying any other gameplay elements.
The nice thing about the NES is that its controller has eight digital buttons — Up, Down, Left, Right, Start, Select, B, and A. This means that the on/off status of all the buttons can be stored in a single byte and read with a simple bitwise AND operation. The NESDev documentation for reading controller input helpfully notes that the joypad status is stored in memory address $4016, which saves us some trouble.
Finding the RAM Address
Let's verify that it's correct by firing up a debug-capable NES emulator. For that I turned to the trusty FCEUX. Are there more modern NES emulators? Probably. However FCEUX is the one that I'm the most familiar with, and after a quick search, still seems to be one of the most feature rich, at least for hackers like ourselves. Thus, I fired up a copy of Kirby, scrolled to $4016 in the tool's Hex Editor, and pressed some buttons to see... nothing changing.
What gives? I'll admit this confused me quite a bit when I first undertook this project, which is what I get for only skimming that NESDev article. That page says that the joypad value is stored in $4016, and yet I see nothing. NESDev is a very widely used resource, surely it wouldn't be wrong about something as simple as this?
As it so happens, the experts who wrote that article do in fact know more than I. If you read it more thoroughly than I did, you'll quickly pick up that the joypad register is not a typical memory address. It is at the intersection of hardware and software, and thus gets handled differently than most. Rather than simply having the button bitfield nice and laid out for us, games must poll the controller for its status by writing certain values to it, then reading back its response. Fortunately for us, we're not writing an NES game ourselves, we're just hijacking one. The good people at HAL Laboratories already did the work in parsing the joypad's raw values and buffering them somewhere in RAM for the various subroutines to reference. This isn't a standardized location, it would've been up to each developer as to how they wanted to cache this data, so we'll have to find it ourselves. A small setback perhaps, but not one we can't overcome. To do this, we'll use a very handy FCEUX feature known as the "RAM Search".
Finding the RAM Address, For Real This Time
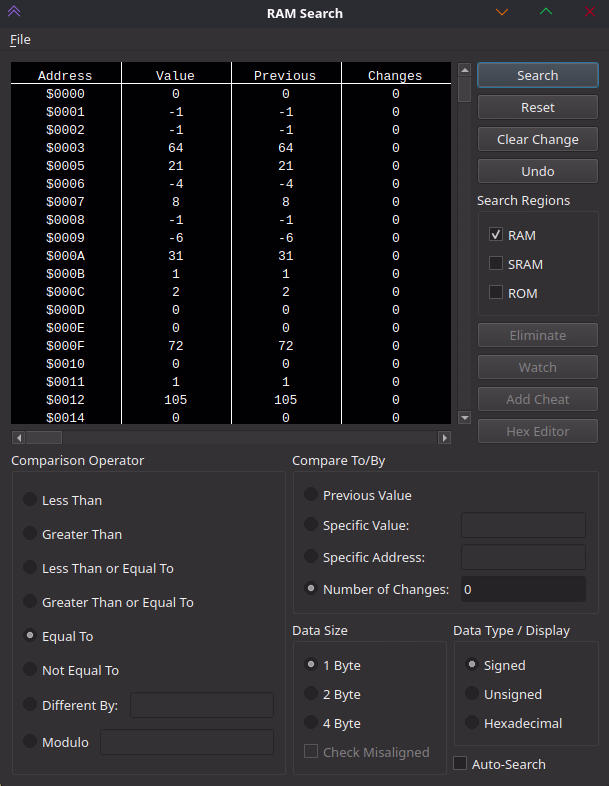
This feature is not one that I've seen in many other debug-focused emulators, but it's incredibly useful. The UI allows you to compare how the contents of memory have changed across various snapshots, allowing you narrow down towards a target. For example, if you know your target address will not change (which ours won't, so long as we don't press any buttons), you can continuously filter out any addresses whose values have. Since many RAM values are changing all the time, this very quickly narrows down the list to a level where we can start to evaluate things manually.
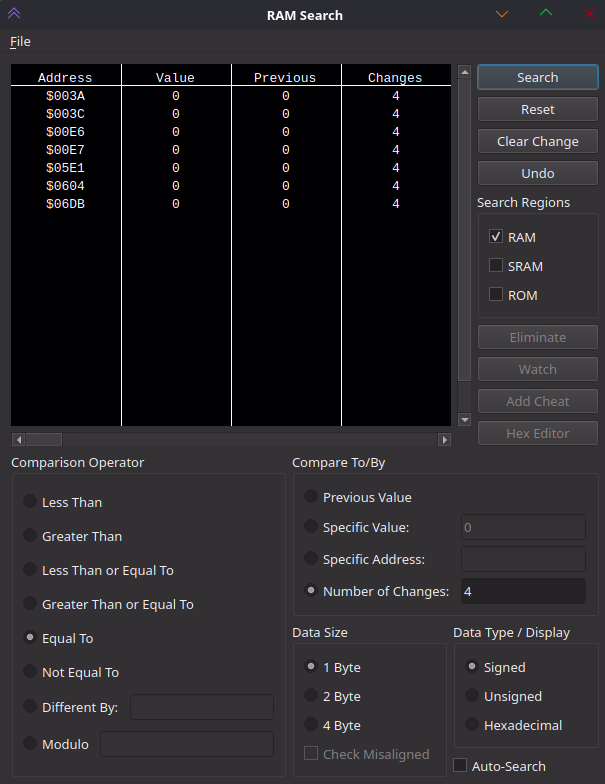
For some projects, knowing how to effectively reduce the list of possibilities is complicated, but for detecting button presses it's easy. Continuously refreshing the list without pressing any buttons quickly removed a sizable chunk of possible addresses. Pressing and releasing a single button registers as exactly two changes, and filtering on that quickly narrows down the selection to a very approachable number. From there, I simply watched the values myself, pressing different buttons and noticing which had a single, different bit switch. Through this method, I finally narrowed down the joypad register as $00E6.
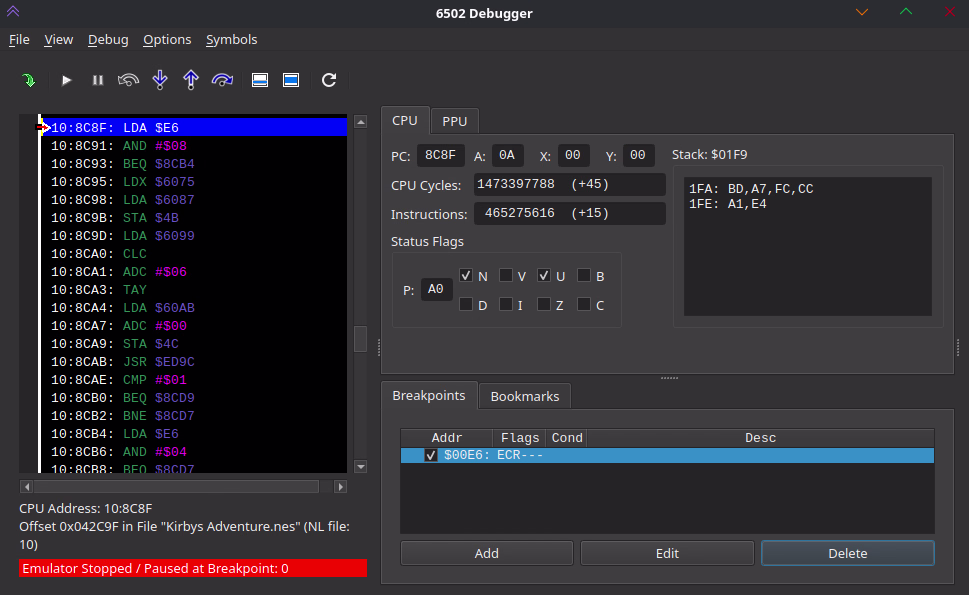
Now that we know $00E6 is the address to watch, there's a few new pieces of information we can glean. Firstly, by pressing each button in turn, we can learn which bit corresponds to which input. Up is $08 (or 0b00001000) while A is $80 (0b10000000). This means that we should be looking for places in the code where the game reads the value from $00E6 and then performs an AND operation with $08 for Up1. In NES 6502 assembly these two instructions would be written as LDA $E6, AND #$08. Rather than search the entire game code ourselves, we shall turn to the debugger and its breakpoint functionality.
1 We actually need to keep an eye out for any value that has the Up bit set, such as $18, $09, and so on. It turns out that the code only ever checks for a single button press at a time, so I'll simplify here.
Identifying the Subroutine
Breakpoints are a feature to specify a memory address to watch, checking if they're ever read or written to. When they are, the entire game pauses so we can poke around the game's internal values. Almost immediately after setting a read breakpoint at $00E6 and resuming the game, it halts. As you can imagine, an NES game is checking for button presses several times a frame, to see if the player should move, jump, attack, pause, etc. Each time it breaks, you can see something similar to the pattern described above, although not always checking for #$08, sometimes the game is understandably looking at other buttons. By repeatedly resuming execution and breaking again, we can get a short list of lines that do match the #$08 pattern. While just standing still in the overworld, I encountered three such locations, at 10:8C8F, 10:8A15, and 10:8B06. Honestly, that's a lot fewer than I was dreading, there could've been hundreds that we would need to vet. Instead, three is pretty manageable to handle manually.
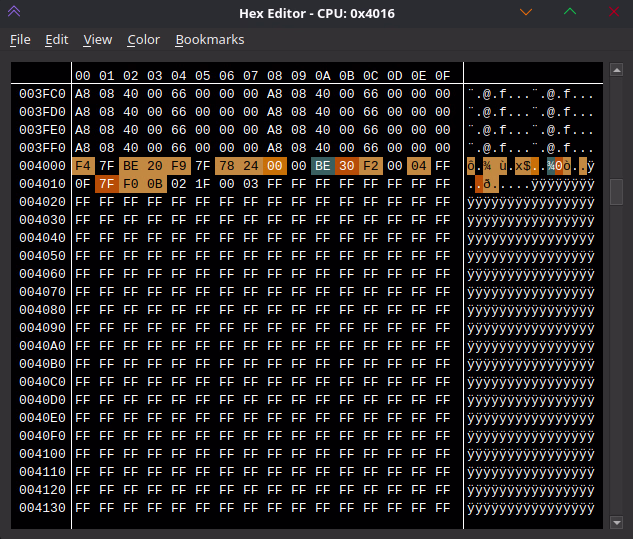
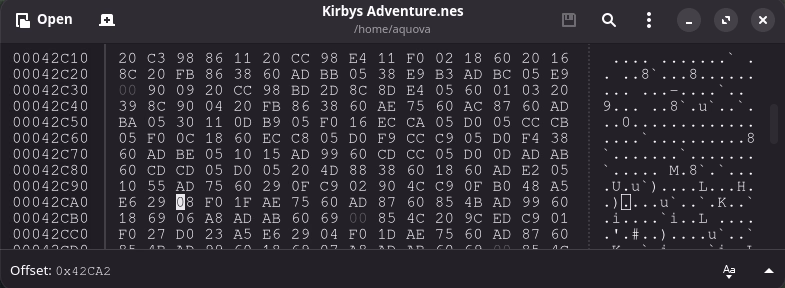
So, let's do just that. With the execution paused at the breakpoint, you'll notice that FCEUX helpfully tells us not only where in RAM this code is located, but also where in ROM the game loaded it in from. Most emulators don't do this, and while it isn't too hard to map back to the location in our .nes file, this is a very welcome feature to have.2 You'll need to grab a hex editor for this part, and I would recommend making a backup of your game while you're at it. For this first breakpoint, it says that this instruction is at $42C9F in ROM, and sure enough just a few bytes later is our $08 in question, at $42CA2. Let's go ahead and change that to a $80, load this new version, and see if we got really lucky.
2 The easiest way to do it manually? I look at the RAM viewer, grab a sequence of about a dozen bytes, and look for those in the ROM file. You'll likely only find a single hit
Verifying Our Changes
You can test our success by jumping with Kirby, and then immediately pressing A in mid-air. When we find the right address, he should puff up, as opposed to doing nothing. Drum roll... Nope. Wrong address, the game behaves the same as it did before. Well, we had a one in three chance. By performing the same procedure with the other two addresses (spoilers: it's the third one) you'll finally end up with a version of the game where pressing A, not Up, inflates Kirby. Simply replace the $08 with $80 at address $42519.
Now, I promised you only a single bit change, not two, as I actually want to leave the Up functionality in place, rather just swap to A. This is easily done, you just need to insert a combination of the two set bits — $88. I also spent a good deal of time ensuring that no other behavioral changes were caused by this change. The proper way to do this would be to analyze the subroutine we changed in more detail, to get a sense of exactly what it was doing. I took the lazier route and just played up through the first boss, and called it a day.
The final step is to bundle this up for distribution. Most players do not enjoy following instructions on which bit to change in their files, they expect something like an .ips patch file to do the heavy lifting for them. A patch file is just a diff between our changes and the original file, so the user can replicate those changes without sending copyrighted files to each other. I trust most people can find an online site to generate these for them, but I did want to point out one thing. Due to the overhead and metadata needed for a patch file, our one bit change tallies in at a whopping 14 bytes. Madness, a 112x increase!! What has the world come to.
If you want to try the mod for yourself, I uploaded it to Romhacking.net or it's available for download directly from this very website.